Water Filter Project
Gantt chart:
We made a gantt chart so that we could manage our time in a more effective manor during the project and make sure we complete all of the steps on time. When we did fall behind on one of the steps, we worked harder to catch up and progress further into the project. The gantt chart also helped us to divide the responsibilities so we could get the project done faster and more effectively.

We split some of the responsibilities to speed up the process on this project. Hattie started working on the weebly, while I started brainstorming designs and materials to use. After Hattie completed the beginning parts of the weebly, She helped decide which concept we should create. We each made a sketch and then we worked together for the rest of the project.

Brainstorming:

My Design:
|
Hattie's Design:
|
Generate Concepts:

Grind up banana peel with a coffee filter
A pro for this design would be that no one else is going to use a banana peal so this object will be unique and unlikely to be taken by another group. A con for this design would be that we would have to keep bringing in new ground up banana peels whenever we tested it. |

Empty liter bottle of water, sand, gravel, cotton balls or cloth, and charcoal
A pro for this design is the use of sand, cotton balls, and the bottle of water because they are easy objects to get. A con is we cannot use charcoal since someone has taken that material. |

Milk carton, layers of cloth, and gravel
A pro for this design would be the accessibility of the objects and the simplicity of the objects used. A con would be making sure the objects all work well since there are not that many layers. |
Explore Possibilities:

We tested a water filter with charcoal and the result was not too great. The turbidity value was 400 NTU.

We tested a water filter just using sand and it was for sure not the best way using it by itself. The turbidity value was 403 NTU.
|

We tested a water filter just using coffee filters and the result was a little better than just the sand. The turbidity value was 395 NTU.

We tested a water filter with just tissues and this turned out to be the best material that was tested. The turbidity value was 102 NTU.
|
We tested a water filter with the blue netting and the result wasn't too bad. The turbidity value was 150 NTU.
|
Select Approach:

Develop a Design:

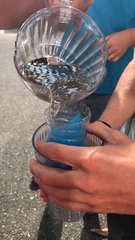
Final Model:

|

|

Testing
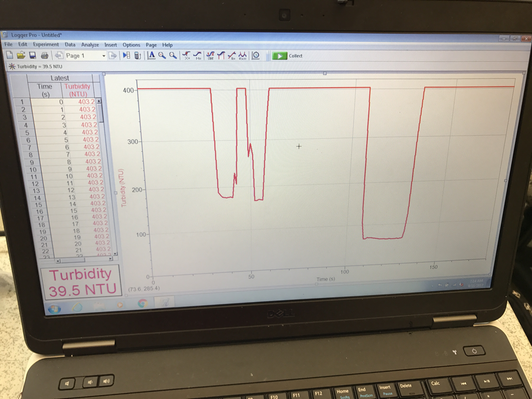
Our design was able to filter the water to a 39.5 turbidity level, which is well below the 50 turbidity level that was required. Due to our design working on the first try, we did not have to alter it to fit the criteria.
Refine the Idea:
We did not have to refine our idea as our first design ended up working on the first try and we were not required to change it. If we were going to revise our design we would add more tissues and more layers of sand in between each layer of tissue.
Conclusion:
I really enjoyed this first project, I thought it was a terrific way to reintroduce us all to processes that will come in handy when we move onto our Capstone project. I learned from this project that whenever I travel anywhere I should bring lots of tissues,as they are great for filtering water and you never know when you could be in a situation where you need to filter dirty water. If I could redo this project I would definitely start to work on the weebly earlier into the project so I don't have to do it all at one time. I felt that Hattie and worked well together and were able to split the workload pretty evenly. I think that it really helped that Hattie was able to knock out parts of the weebly early on, so that I was free to brainstorm and research ideas at the same time. For next year I would not allow students to use tissues so that they could come up with more original solutions to this problem.
